Showing posts with label Arboriculture. Show all posts

Sunday, 4 January 2015

Van sign writing

Had My truck sign written over the Christmas period


Pretty pleased with the outcome 

Monday, 27 October 2014

Retrievable Top tie for SRT

I've always favoured a top tie for SRT, I find it cleaner and neater and don't need to worry about someone (or me!) cutting my base tie. I tie a figure 8 around a dmm anchor ring which has been preinstalled on the other side of the line. This way there is less friction/ware on the point at which it cinches on the line/tree.

The main flaw with this system being that I always need to climb back to the top to remove the tie in and then usually have to switch back to double rope to descend.

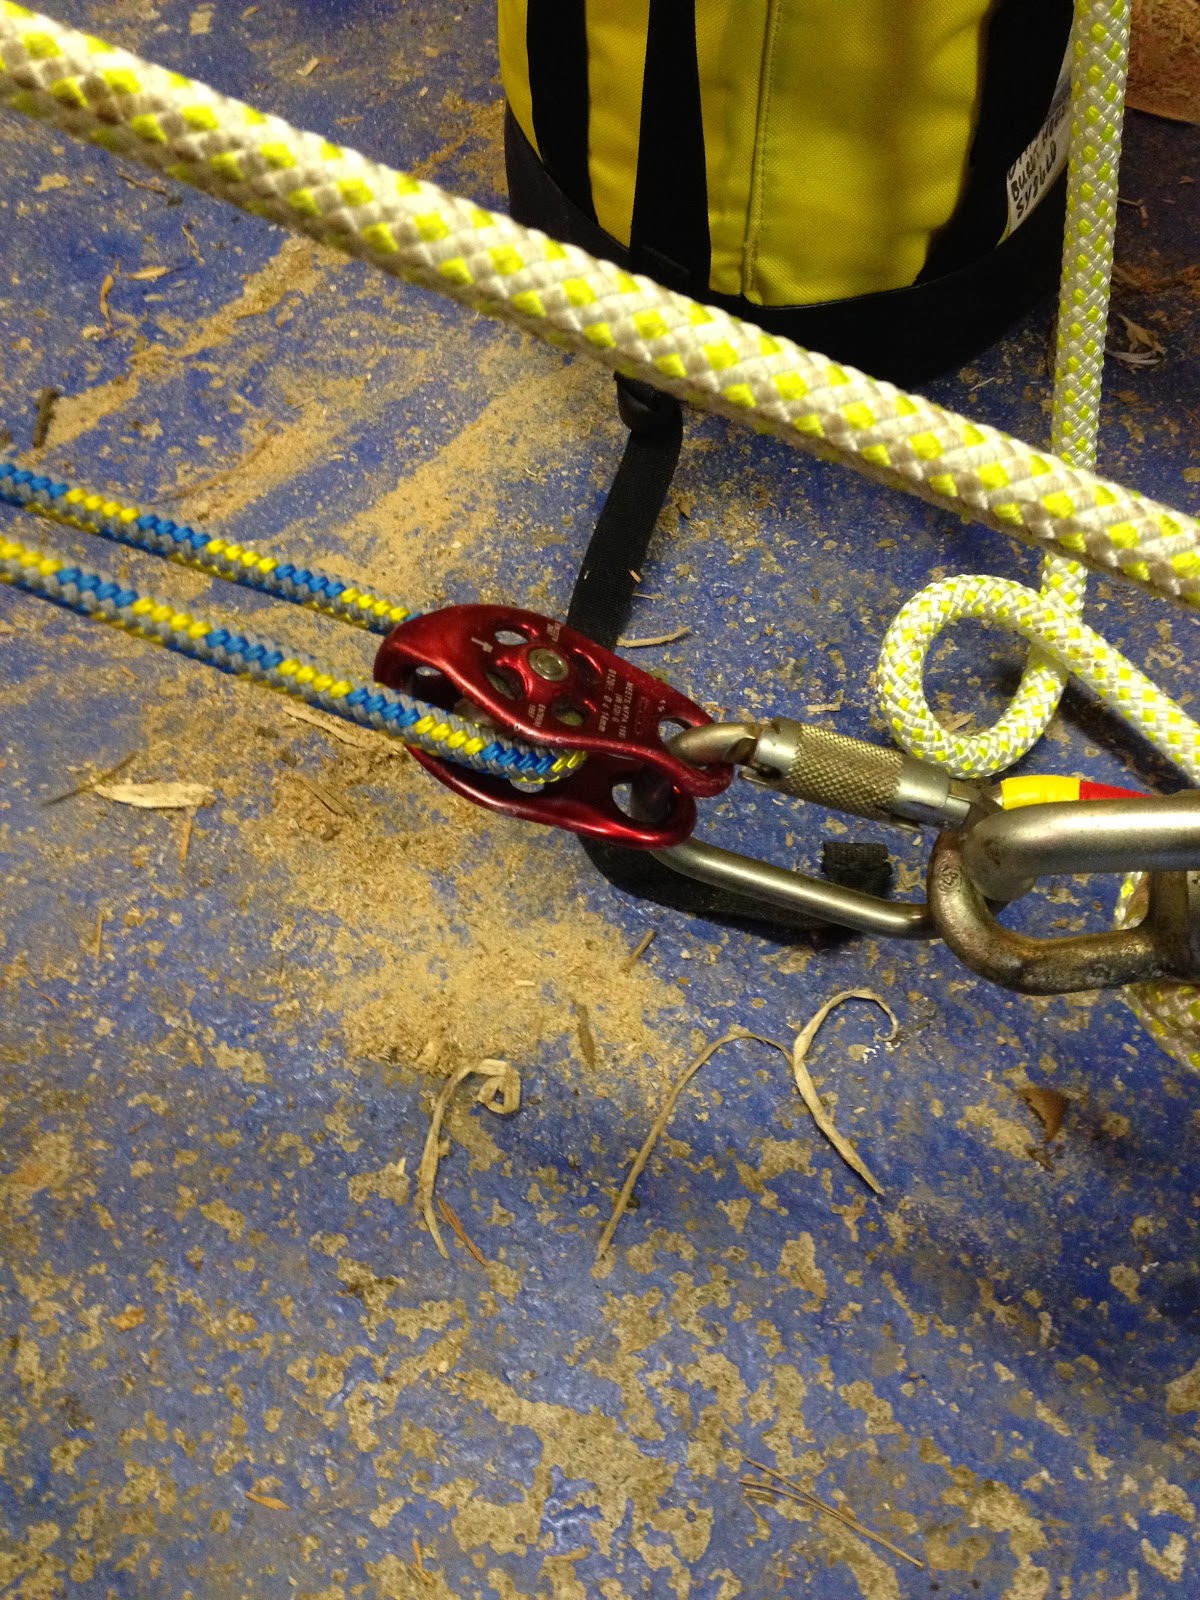
Whilst there is nothing wrong with this it can be quite time consuming, So I have been experimenting with using a 5mm cord and a small DMM snap to retrieve the line


I clip this into the figure 8 not the dmm anchor ring, as then when you pull the cord the ring stays in the right orientation and does not add friction to the system, it seems to retrieve the tie in quite well, the cord is just thick enough to get a good purchase on it to give it a good pull. It has worked on a 2ft ivy clad stem so I'm hoping it will retrieve from most anchors. the only issue so far is when to clip the line in and how much would it get in the way if installed at the beginning?

Thursday, 13 March 2014

Mini MA system: more pics

Just some better pics of the mini MA system I've been playing around

Set up in situ as the stein block goes on
Here you can see I've tied a small loop on the tail of the cord that attaches the pinto to the  rope grab
then its fairly straight forward to clip the rope grab to the rope and unclip from the mounting strap
Here I've hoisted up a pretty hefty lump of eucalyptus
Tying off the rigging line on the stein block in order to advance or remove the rope grab

Hope these pictures help to explain the system slightly better, will try and get a video up soon 

Tuesday, 11 March 2014

Mini mechanical advantage system

Can you guess what it is yet?


I've mentioned in previous posts how I've been playing around with a few ideas for tensioning the rigging line. I was looking for several things: something simple that could be taught in a few minutes that was also fairly idiot proof, something that was easily installed and not too gear intensive, I wanted at least a 3:1 mechanical advantage (MA) and I wanted to avoid having to use knots to attach it to the rigging line.

This has yet to be used in anger and only played about with in my workshop so you'll have to excuse the pictures.

So if you assume the rigging line has been set as normal and the end your looking at here is coming down from the tree to the protawrap/bollard.

 
The rope grab is attached to the line with the MA system already in place
 
 
The other end of the MA systems clips into the top of the porty/bollard
 

Then by pulling on the working end of the MA system tension is applied to the rigging line, with progress being captured on the porty/bollard
 

Once the MA system is out of room the rigging line can be tied off
 
 
A few wraps and a couple of half hitches usually does the trick

 
And if needed the MA system can be advanced up the line again to add more tension/pull the line further.
 

When not needed or once the line has been tensioned sufficiently the rope grab is removed from the rigging line and clips into a stein mounting strap installed well above the bollard, the other end of the MA system can be left in place for the duration and everything is ready for when MA is needed again.
 
 
So this is by no means the best explanation but I hope you get the general idea. everything is pre tied and set and gets put away as in the top picture. So when your setting up first thing all you need to do is install the stein mounting strap, clip the rope grab end to it, and the other end clips into the bollard and then its all ready to be used as and when needed.
 
I'm going to try and get a video of it in use as I feel this will help a lot with the explanation!
 
Any thoughts or queries?


Sunday, 9 March 2014

Splicng Loopies and Woopies

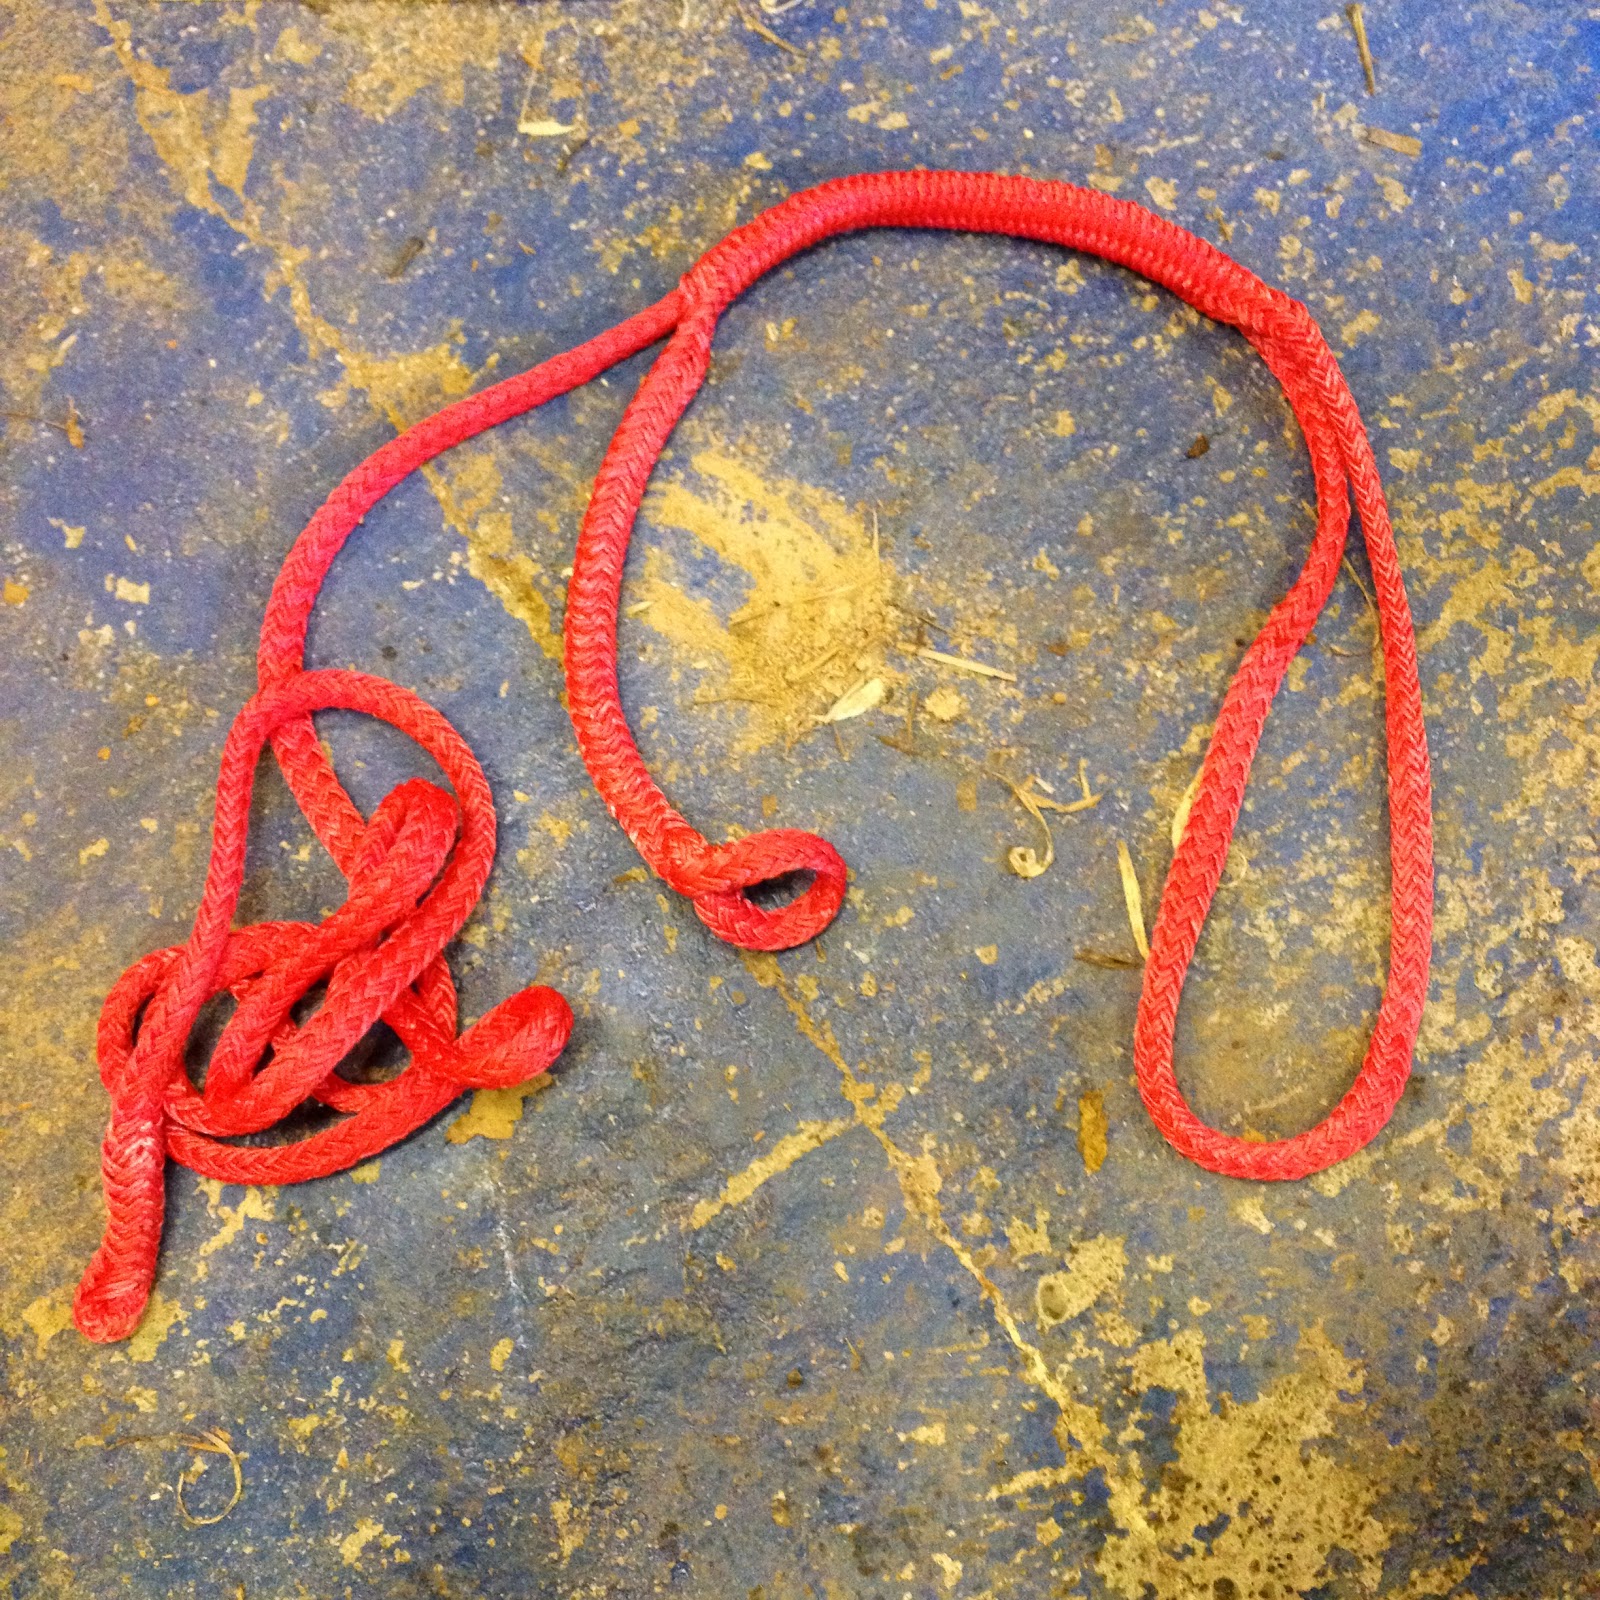
Not an instructional post as there are plenty of those around if your looking to learn how to splice tenex, this is just a couple of pics of a Woopie sling and Loopie sling that I made recently.
 
Its surprisingly easy stuff to work with and both of these took me less than an hour, cost wise it probably doesn't work out much cheaper than buying ready made ones, but I was more interested in learning the process than saving money, plus I wanted a larger than average woopie sling for fixing the porta wrap to large diameter trees


These adjustable slings are really useful tools to have in the bag and open up many options for complicated rigging jobs. 

Monday, 24 February 2014

Felco Secateurs Model 4 Standard - Review

As far as I'm concerned a good pair of secateurs is an essential item in any arborists tool box. I use mine at least a couple of times every week; on small reductions or thins, pruning young trees from the ground, formative pruning on newly planted trees even chopping stuff up smaller to bag up on 'through the house' jobs.

I've had these for about 10 months now and I'm pretty pleased with them, there a massive improvement on the pair of cheepo ones I had before.


The model 4 Felcos are a fairly no frills version but do everything you'd expect of them, they will cut up to 1" diameter branches (species depending) They cut clean with very little tearing of bark and splitting of the wood, this obviously increases with the larger branches/twigs. With smaller finger sized stuff cutting is pretty effortless and the curved blade and anvil prevent the piece from slipping, handy when your at full reach on the tips of a wet slippery Lime!


There is very little to go wrong with these secateurs, they've suffered a reasonable amount of abuse in the time I've been using them, been dropped plenty of times and have spent a lot of their life kicking around in the bottom of my climbing bag. They are showing very few signs of ware and the edge is just as keen as the day I brought them. At around the £30 mark they are a bit of an investment compared to a £5 blackspur pair, but assuming you don't loose them they should last 10 times as long. 

To be honest I don't use them quite as much as I should, often making do with my Silky for small diameter cuts that it really isn't suitable for. Having a pair of secateurs on you just gives you that increased level of accuracy and ability to leave some very tidy finishing cuts. 


I find the only down side to these is that they don't have any means of attaching a lanyard of any description which can be a bit of pain when in the tree. I've managed to solve this when I was given an old leather Felco holster that holds them nice and snug and has a fairly solid clip for attaching them to my harness with 

All in all pretty pleased with them and would recommend them to anyone looking to invest in a quality pair of secateurs. I would also recommend anyone starting out in Arb, looking to improve on their reductions to try taking a pair up and seeing if you find it any easier/notice a difference in quality. 


Wednesday, 12 February 2014

ISC RP205 Rigging rope grab

Lately I've been playing around with a few ideas for a slightly easier method of pre tensioning the rigging line when using a fixed bollard or similar.

One of the key things I needed was an easily attachable mechanical rope grab that was compatible with 16mm lines.

After hunting around for a while I stumbled across this ISC rope grab.


Not necessarily what I initially had in mind but it is compatible with 14-16mm lines (and will actually fit our 19mm bull rope in as well, although not recommended)


This model comes with a push pin. Basically by pushing the small silver pin in the middle of the red ring you can see, the pin then slides out releasing the cam 


Not something that can be done one handed but is quick enough and hopefully will work pretty well for what i have in mind for it. 

I quite like the simplicity of this device, no springs or small parts to go wrong and the only 2 moving pieces are attached via small wires. It has a very solid feel to it and I have no doubt it would take a lot of abuse before showing any signs of ware. Now I just need a few more bits and I'll hopefully have something a bit more interesting to share...   

Wednesday, 5 February 2014

Every day carry Items part 2

Just a quick follow up to a previous post where I mentioned that I carry one of these Petzl Bucket bags with me on every job
 
Here's a photo of the contents


So there is the Crampon bag and tool roll that I have mentioned previously as well as the following:
- Couple of pairs of gloves
- Set of ex military Gore tex over trousers, quite good for climbing 
- Pair of leather heavy duty gauntlets, for those spikey trees
- Dry bag with spare T shirt and socks, encase the water proofs fail!
- Another pair of water proof trousers, only these are salopette style ones, made from cheaper flexothene material, ideal for ground work on those proper wet days
- Hi vis
- First aid kit,
- Felling wedge, there is usually a high lift one in here as well
- Gore-Tex jacket (not shown)
 
I find these items cover me for most eventualities, the bag doesn't take up much space, I always know where everything is, its always kept together and I can always have it with me.
I still have to take another bag with my lunch and drinks in, but it means the bucket bag can stay at work/in the van and I only have to take my lunch bag in with me every night.


Monday, 3 February 2014

Different cuts #1 wide/open mouth

One of the things I always try to pass on to those starting out in this industry is that everything is down to control; from how you move in the tree to the different cuts that you make, so long as you are always in control nothing unexpected should happen.

This is especially true with the use of felling cuts for removing tops, branches and limbs. Obviously the lay of the piece to be removed has a large amount to do with where it will go, but a lot of control can be exerted over the piece but changing the angle of the face or mouth and the angle of the hinge.

One I like to use quite often is to have a very wide mouth/face cut, this means the piece of timber has to travel further before the two cuts meet (and assuming you've cut a sufficient hinge) the piece is released from the tree.

One of the main times I use this cut is when 'turning tops' This cut enables me to fold the top almost into the tree, with the hinge giving way at about 8 o'clock (when looking at the picture above) then with my hands on the butt of the top I can continue its current arc and flip it to land flat with the butt facing away from the tree. As below

 
This speeds things up on the ground as its facing the right way for dragging away from the tree, it also damages the ground less as it lands flat and the force is spread out along its length.
 
Ignoring the flipping for a moment this cut by itself also helps to minimise the shaking of the top you experience, especially on skinny trees when the hinge gives way. This is due to bending moments and the forces involved when a top starts to fall. I'll discuss this more in a later post. (or check out 'The art and science of practical rigging') for a more in depth look.
 

Saturday, 1 February 2014

Stein RC-3001 - Notched in

I talked about the Stein RC-3001 a while back and mentioned how we had never notched it into the tree

Well the oak we did this week definitely called for it. It made a huge difference, we were dropping some huge loads on it and it never moved an inch. for the extra few minutes in set up time it was definitely worth it.


Thursday, 30 January 2014

Blocking down

Everyone seems to have a different term for this; Blocking, chogging, negative rigging, dynamic rigging etc...

Basically when the piece of timber is directly above the rigging point and is then inverted 180 degrees and lowered down I call it blocking down or dynamic blocking.


This is one of the bigger lumps we did, the rope should have been allowed to run a lot more to minimise the shock load, but we were a bit over cautious and put one too many wraps on the lowering bollard, which in turn led to too much friction on the bollard and the shock load on the system you see here. 


As a side note if the stem is to be dismantled in sections but not rigged, I call it chogging down. Don't ask me why, just always have. The guys on the ground always seem to know what I'm on about anyway.

Wednesday, 29 January 2014

Rigging line redirect

The anchor point I was using in the oak yesterday was slightly stepped out from the main stem meaning  that the rigging line wouldn't of entered the lowering bollard at the correct angle. So to rectify this I installed a second Pulley block at the top of the stem, at the crown break.


This ensured that the line ran plum with the stem and entered the Lowering bollard at a right angle to the stem. 


The large ISC pulley block might be a bit overkill for using as a redirect but it was the only pulley I had with us that would fit both the 16mm line you see hear and the 19mm we switched too when we moved onto rigging some bigger lumps. 


Tuesday, 28 January 2014

Working a Spar SRT

I dismantled a large oak earlier this week, the crown came out easily enough and we were down to the stem by lunch time(ish)

Call me a cheat for using ladders but It's still the quickest way into a crown!
The stem was obviously slightly more time consuming, especially as it was up to a metre in diameter in places and due to a fragile patio underneath everything had to be lowered. Now I quite enjoy blocking down big lumps of wood but they can be pretty time consuming to set up, which is why I frequently work them SRT.

I simply choke my line at the top of the last cut, descend to where I want to cut next (with rope wrench attached) I have the pulley block, dead eye and rigging line clipped into my anchor ring, so they are out of the way and not hanging off my hips, I am then easily able to make the face cut without any danger of cutting anything. 
The stem after 3 or 4 large lumps had been rigged down, you can see the largest still at the base of the tree, to big to be moved we had to cut it up where it sat.

Once I've made the face cut, the pulley is attached as close to the face cut as is practical. The rigging line and pull line (if applicable) are next to be attached before I strop in, move my SRT anchor to just above the pulley, make my cut and hold on! Then its a case of un-tieing the dead eye, clipping it to my anchor ring (pulley/rigging line still in place) descend and get ready to start all over again!

When it comes to either descending to a point where I can't reach my anchor to retie it (or coming down at the end of the day) its a good idea to make the anchor retrievable, in which case I use an Alpine Butterfly

First enough rope is pulled round the stem to reach the next point/ground, then I tie the alpine butterfly into this long end, then simply clip a karabina through the loop and onto the other part of the rope (closest to harness/hitch) making sure the gate is facing up, this is then synched up tight to the stem.

Now I wouldn't recommend this as a permanent anchor to work an entire tree, but for working on a large diameter spar like this I think its fine; its always in sight so you can see its not cross loaded or coming undone, and the stem is large enough that the krab is being weighted along its correct axis.  

Coming down at the end of the first day

Retrieving the anchor 

Then when it comes to retrieving the anchor you just pull down on the knot side of the rope until it gets to you, unclip, untie the butterfly and pull the rope down. 

Thursday, 23 January 2014

Husqvarna T540XP - First impressions

We got this yesterday and I got to give it a spin today


We mostly run with 200t's where I currently work. Some of them are getting pretty tired now and spend more time being fixed than being used. We have one 201T that hasn't really impressed us, so when the time came for a new saw we opted for Husqvarna's new offering to the market. 


Now this has been out for a few months, long enough for people to give it a good battering and I read a lot of reviews before deciding to commit. Most of which were pretty positive. 

First impressions are good, its well balanced and lightish, it does feel a little bit plasticy, but most saws do nowadays. I have only used it on a couple of smallish reductions so far so can't comment on the power too much, but it does seem to be there and no delay when squeezing the throttle, which is the 201's main flaw. 

Although I think I'm going to have to give it a good couple of months of hard work before I make any kind of judgement on it, watch this space…

Tuesday, 21 January 2014

SRT Strop

This is a neat little trick for when your work positioning strop isn't quite long enough and you want to choke it round a stem/branch and use it in a single line configuration and want to avoid cross loading the karabiner 


Obviously you shouldn't be descending solely on a hitch, but if used for assent or work positioning it should be fine. 

Monday, 13 January 2014

Nice bit of Rigging - Stein RC-3001

Had this Eucalyptus to fell today, nothing too serious, but quite a tidy lawn so we rigged everything down.


Multi-stemmed with a reasonable spread, managed to select a decent stem to have both my anchor point and a rigging point, from which we were able to rig everything down safely. Had 3 groundies on this so we were taking it in some pretty big lumps, 1 guy working the ropes and 2 clearing the drop zone.  


As I knew there was going to be a fair bit of rigging we brought the Stein RC-3001 along with us (where as we often make do with the humble portawrap)


Works exactly the same, with wraps being added as the lumps get heavier


Although being a fixed bollard its a bit more fool proof and much easier to remove slack from the system; I've seen guys get in some horrendous states with portawraps before now. 

When its notched into the tree its rated at 3 tons, and at 500kg when mounted just on the rubbers. But to be honest we rarely notch it and have dropped some big lumps with out it moving an inch. This is in part due to its bomb proof construction and the heavy duty ratchet strap that securely fixes it to the tree, (This can be done with one person but is much easier with two) 

Having used a fix bollard lowering device quite a lot in the last 12 months I would find it hard to go back to using a portawrap for big trees. If the Stein block (as we call it) wasn't such a heavy thing to carry round we'd no doubt use it for every rigging job large or small. But as it stands it is a big thing to take to every job, so we often just take the portawrap, which does the same thing, just not quite as user friendly and harder for inexperienced ground staff to become proficient at. 


Sunday, 12 January 2014

Token TIP (tie in point)

I've been doing quite a lot of storm damage work lately. Any of you with experience of this will know that its not as clear cut as most stuff and you can't always rely on having a suitable anchor point to work from. So you frequently have to improvise, compromise and generally make do.

Take this willow from last week, it had lost its top leaving only a couple of biggish side branches that curled upwards, over a fence, so couldn't be dropped in one. Not practical to get a cherry picker in for it so had to be climbed.

I'm probably a good 1.5m above my anchor here, with enough rope in the system that I would probably deck out if I swung towards the tree, but by keeping my work positioning strop attached to the branch I'm walking out on I'm protected from a major swing and it at least offers a small amount of security should the branch fail. 

By working single line it meant I could tie in around the broken stem and maintain constant friction on my hitch. Now some may say whats the point in this TIP (tie in point) when you'd hit the deck if anything were to fail, the point is that any roping point is better than none and this one gave me something to lean against when walking out on the branch, and by balancing the tension between that and my work positioning strop I could stand upright comfortably and securely, enabling me to safely remove the branch in manageable sections. 

Tuesday, 7 January 2014

My Rope wrench/SRT set up

I did a post last week on some of the benefits of SRT and i thought I'd just share a few pics of my current rope wrench set up


I love climbing single line, but I don't use it for every tree, so having the wrench set on a Dmm oval, means that I can quickly switch from double rope (DRT) to single. The knot is a distil tied on 10mm line, but with fisherman's either end instead of spliced eyes. This enables me to keep it real short and minimise sit back. The knot works equally well for DRT


The tether is based around a short Wild Country quick draw sling, this fits snugly in the wrench, keeping that end fairly rigid, the other end has a petzl quickdraw rubber and another karabiner rubber that stops the tether moving too much on the Krab. it is all then stiffened up with a few layers of heat shrink. 


My climbing line is Yale lime light (11.7mm) works really well with the wrench, can be a little bit bouncy when working single line but otherwise a really nice rope. May well do a full write up on it at some point.