Showing posts with label Arborist. Show all posts

Sunday, 21 September 2014

APF 2014

Managed to get across to Ragley Hall yesterday to check out the APF forestry exhibition. Its always a good opportunity to check out the latest gear and machinery, as well as do some shopping!

Picked up a few bits for myself -
Another Petzl bucket bag! 25m of 8mm Sirius accessory cord (my hitch cord of choice, this should last me a while!) and some 8mm Liros armor hitch cord I decided to try.

Also got myself a pair of Arborwear canopy trousers that I've wanted to try for ages 


As well as an Arborwear polo shirt. I'm currently looking to get some work shirts printed, but want to start off with a decent shirt, rather than the standard fruit of the loom ones. So thought I'd give one of these a go. 

Also picked up some bits for the company I do some work for in London - 

A tree runner p500, to replace the portawrap in our lightweight rigging kit (fixed bollards are so much easier for people to get to grips with)

Some weaver spikes for the aerial rescue kit and a new husky T540xp for the other team. 


Thursday, 28 August 2014

Stein RC3001 - storage solution

Anyone who has read more than one of my posts will no doubt be aware of my slight obsession with climbing/rigging gear and there associated kit bags, as well as generally being OCD about organising my tools and equipment.

So when I recently got a new Stein rigging bollard I was faced with the challenge of somehow getting it to fit in one of the Petzl bucket bags I'm always waxing lyrical about.

I knew it would fit, but not lying down as it would be too wide, so it would have to be standing, but weighing in at 14kg that was going to be an awful lot of pressure in one spot. That coupled with the general awkwardness of getting anything else in the bag, as well as keeping the bag upright in transit led me to the following solution.


It all fits


Stein block, ratchet, strap, dead eye sling and rubber mountings... 


With everything else removed the stein block remains upright with the aid of a lump of Cedar


A 4" thick plank cut to roughly the dimensions of the bag, with a slit notched into it for the bottom anchor point of the bollard to slot into...


Which keeps the Stein block nicely upright and means the rest of the kit can be fitted in around it 


The rubber mounting blocks fit into the back of the bollard, as they make it too wide if fitted in their normal configuration 


Everything needed in one 25lt bag, it is pretty heavy, but manageable on your own 


Sunday, 4 May 2014

Rigging kits

This is my current set up in terms of rigging gear that I take out on my own private jobs. 


I've talked about these petzl bags before, still can't say enough good things about them.


First up in the large (35lt) bag I have 60m of 16mm Sirius Bull rope and a 4m long 16mm dead eye sling with a small ISC cast pulley attached, this kit only comes out on big jobs or if I don't know the job (i.e.  freelancing) then I may chuck it in as well. 


Then in the first small (25lt) bag I have a selection of things; 30m 14mm sirius bull rope, 5 m dead eye, small ISC portawrap, small woopie sling, large woopie sling,  Medium ISC swing cheek lowering pulley with steel dmm crab,  2m split tail, large loopie sling, x2 petzl tandem pulleys, another smaller woopie (orange) , small mallion, small rigging plate,  2m tape sling and crab, 10m length of xtc line, couple of lengths of hitch cord. 

The idea with this bag was to have everything I'd need for small/medium scale lowering, as well as all the other trinkets you occasionally need for complicated lowering jobs. The 30m rope is usually sufficient for most small trees and also comes in handy as a second line if using the bigger rope. 


Then in the other small bag are some other bits that go out with me on almost every job now. From left to right: in the black bag is the Mini MA system, 22m of 12mm sirius bull rope (tag line), 5m multi sling, 4.5m dead eye, rigging gloves, and big shot/trigger set up 

The tag line has come in handy on numerous occasions, especially on those jobs where I've been told there is no rigging to do and then discover that there definitely is!


I'm pretty happy with my current set up, It covers me for a large range of rigging scenarios, the only major thing I need now is a decent bollard, something like the Stein RC3001 that I get to use for my current main employer 

Thursday, 17 April 2014

SRT and redirects


Just a couple of pics from the big pop fell last week showing the use of some redirects and the further benefits of SRT
This one is a little confusing as the perspective is off slightly,  the left hand stem is the rigging point with my initial  anchor being the middle stem which is then redirected off the next one, allowing me to get much further out on the branch I'm rigging back in. 


My view
The redirect, a lyon sling round the stem with my climbing line secured in place with a clove hitch 

getting out on the tips of this branch enabled us to rig it clear of a couple of fences


Tuesday, 15 April 2014

Lots of rigging

Couple of videos here of the Stein Block and Husky top handle  in action, whilst taking down a couple of big poplars.

Nicely overhanging some fences and industrial units, pretty much everything had to be rigged.


Ended up having a tag line on most of the pieces in order to pull them clear, even had to use the Mini MA system I've been harping on about so much. Came in very handy for a lot of the lower growth that actually dipped down lower than the fences, allowed us to pretension the line much more than usual and in a couple of case lift the pieces up completely with the felling cut on top of the branch. 


You can just see the fence in this photo, with that razor wire type top it was definitely something we didn't want branches getting caught up in. 


Sunday, 6 April 2014

Pulling over a stem/mini MA in action - video

Quick video of the big poplar stem being pulled over with the aid of the Mini MA


The video better illustrates the size and weight of this stem, which standing perfectly upright would have taken a lot of pulling/wedging to get over without the aid of mechanical advantage 

Tuesday, 25 March 2014

14mm Sirius Dead eye sling

Spliced this from the other end of the 10m rope I used to splice a spider leg


Should come in handy for redirects and as a top anchor for the rigging pulley on smaller rigging jobs. 

Monday, 24 March 2014

Pulling over a stem/mini MA system in action

Couple of pictures of my Mini MA system in action this week pulling over a large diameter stem from a big poplar fell


3:1 below on the ISC and the mini MA on top on the pinto

Not abundantly clear from the pictures but basically I set up a standard 3:1 MA on the rigging line using a large lowering block anchored to the cherry tree, this then went back to a Pinto rig attached to the rigging line via a 14mm sirius split tail blake hitched to the line. I then attached My mini MA to the pulling end of this line. This basically meant I had a 3:1 advantage pulling on a 3:1 system, now I'm not sure what this means mathematically speaking (maybe 7:1?) but all I do know is the two guys pulling the stem over had no trouble at all.


I'm sure this is nothing new to a lot of you and setting up mechanical advantage to pull a stem over is fairly standard practice. However I know in the past setting up anything more than a 3:1 just with a rigging line and pulleys uses up a lot of rope very quickly, even with a 60m rope you quite quickly run out of rope unless your anchor is very close to the tree your pulling over.

So by being able to use the Mini MA system on the end of the rigging line this issue was negated as well as considerably cuting down on the setup time. 

I have a video of the stem coming down I will upload at some point. 


Friday, 21 March 2014

Rock Exotica RockO (Non locker)

Got this a few weeks ago after getting fed up with the small conventional style accessory carabinas that didn't seem big enough to hold both of the rings on my cambium saver and still function properly, making it tricky to retrieve from the back of my harness. 


Only a silly little thing but over time annoying enough for me to want to find a solution. 


This fits the bill nicely. Feels solid and well made, no sideways play in the gate and the little groves in the gate definitely aid grip. I'm a big fan of the oval carabina, they just seem to make much more sense to me, any one else agree? 


Friday, 14 March 2014

Big shot trigger set up

There are things I can do well and there are things I cant, using a throwline is most definitely one thing I can't! I think a big part of it is lack of patience, I miss a few times or the line gets stuck and I give up grab the ladders and just climb the tree. This has lead to me never developing my throwline skills at all.
 
So when presented with a job a few years back where ladders were going to be woefully inadequate and the throwline the only realistic option I had a choice to make: practice for hours and hours till I could hit any branch, or buy a big shot...
 
 
So this is the big shot, on its own it definitely increased my accuracy and success rate with the throwline, but still wasn't perfect. The trouble was that there is quite a bit of variation in where you hold the catapult, especially when putting it under a lot of tension, this leads to a lot of variation in where the thing ends up!
 
I spotted a thread on Arbtalk where someone had developed a system involving an archery trigger and a tie down strap to turn the big shot into something you could almost calibrate.

 
Here I've fixed the archery trigger to the business end of the tie down strap and covered it in heat shrink to tidy it up (my gear OCD again!)

 
The trigger clips into a 3mm piece of accessory cord tied onto the big shot pull down handle

 
The hook end of the tie down strap just sits in the end of the pole, I use one 6ft pole for most stuff or x2 4ft poles for really high shots.
 
And you end up with this:
Sorry bit of a rubbish picture
 
The tie down strap gives you a 2:1 mechanical advantage with the grab bit capturing progress, so you can set it to the desired tension take aim and fire when ready!
 
Here's a link to a video of someone else's system in operation
 
 
Then the whole lot packs into this old chalk bag for storage
 
 
Not something for every day use but it most definitely has its place and has saved me a lot of wasted hours.


Thursday, 13 March 2014

Mini MA system: more pics

Just some better pics of the mini MA system I've been playing around

Set up in situ as the stein block goes on
Here you can see I've tied a small loop on the tail of the cord that attaches the pinto to the  rope grab
then its fairly straight forward to clip the rope grab to the rope and unclip from the mounting strap
Here I've hoisted up a pretty hefty lump of eucalyptus
Tying off the rigging line on the stein block in order to advance or remove the rope grab

Hope these pictures help to explain the system slightly better, will try and get a video up soon 

Tuesday, 11 March 2014

Mini mechanical advantage system

Can you guess what it is yet?


I've mentioned in previous posts how I've been playing around with a few ideas for tensioning the rigging line. I was looking for several things: something simple that could be taught in a few minutes that was also fairly idiot proof, something that was easily installed and not too gear intensive, I wanted at least a 3:1 mechanical advantage (MA) and I wanted to avoid having to use knots to attach it to the rigging line.

This has yet to be used in anger and only played about with in my workshop so you'll have to excuse the pictures.

So if you assume the rigging line has been set as normal and the end your looking at here is coming down from the tree to the protawrap/bollard.

 
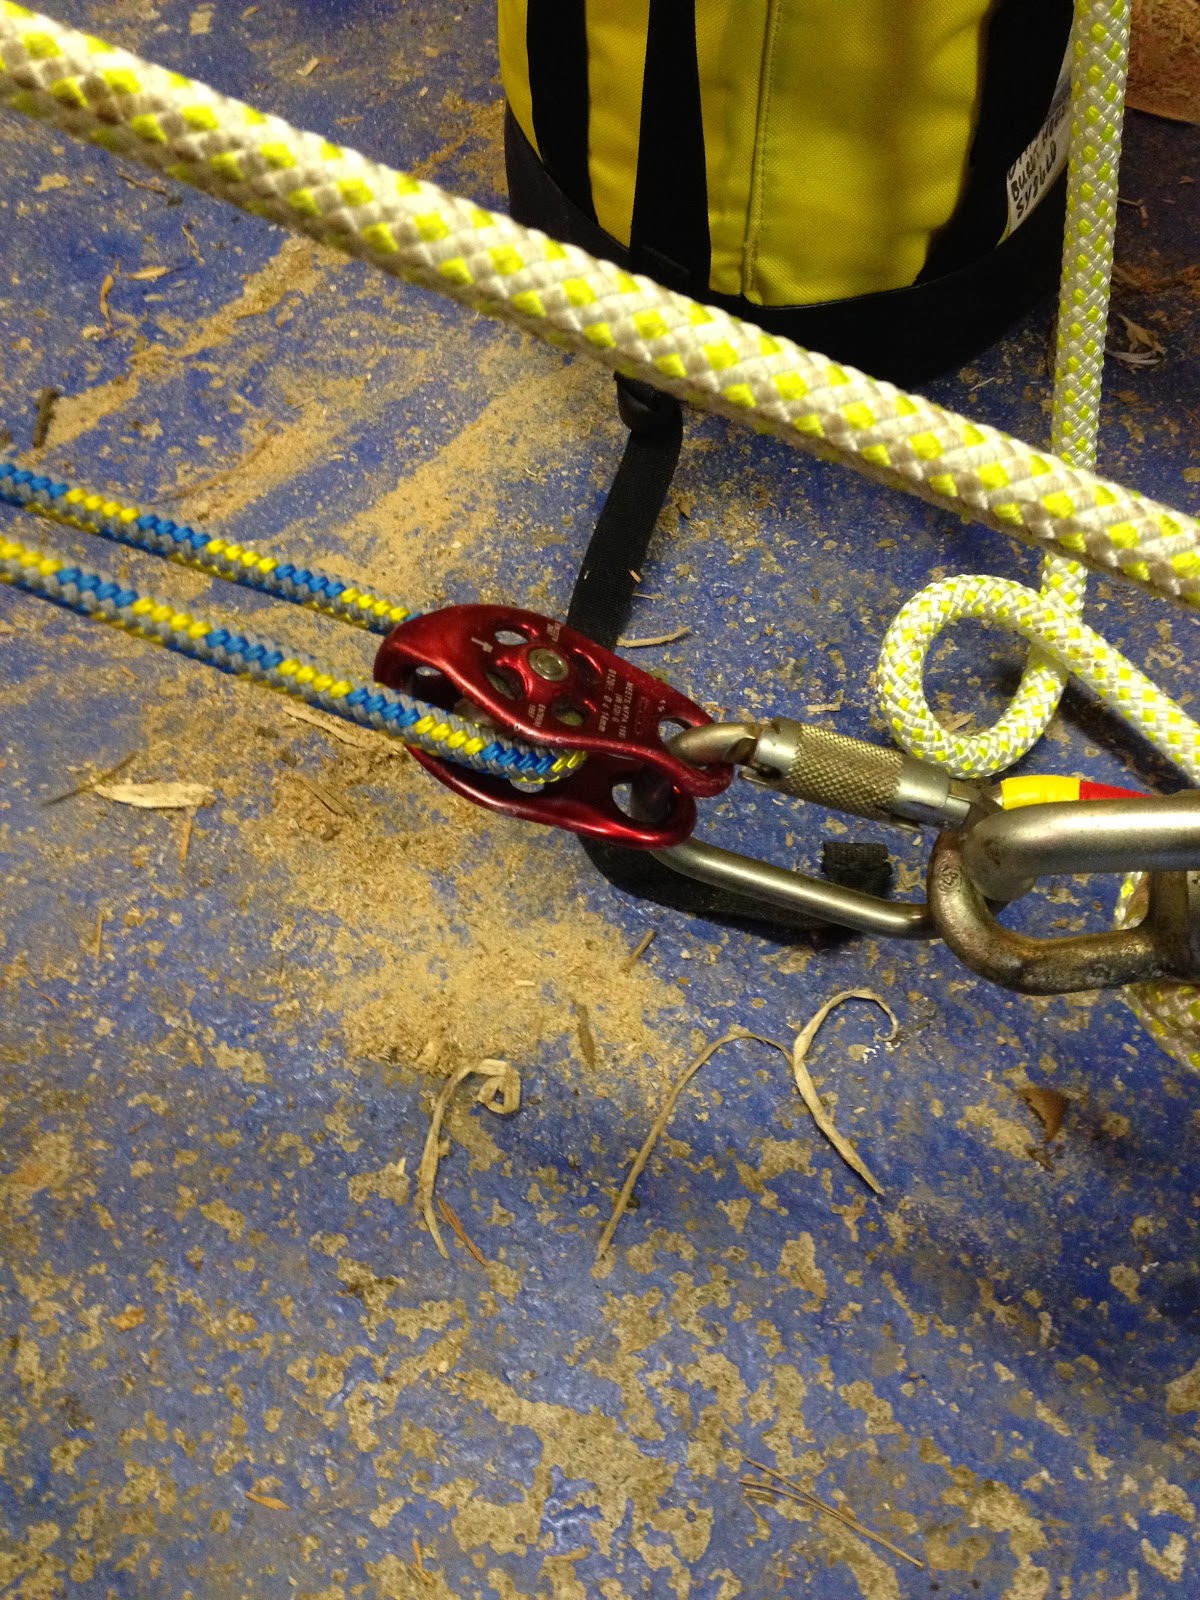
The rope grab is attached to the line with the MA system already in place
 
 
The other end of the MA systems clips into the top of the porty/bollard
 

Then by pulling on the working end of the MA system tension is applied to the rigging line, with progress being captured on the porty/bollard
 

Once the MA system is out of room the rigging line can be tied off
 
 
A few wraps and a couple of half hitches usually does the trick

 
And if needed the MA system can be advanced up the line again to add more tension/pull the line further.
 

When not needed or once the line has been tensioned sufficiently the rope grab is removed from the rigging line and clips into a stein mounting strap installed well above the bollard, the other end of the MA system can be left in place for the duration and everything is ready for when MA is needed again.
 
 
So this is by no means the best explanation but I hope you get the general idea. everything is pre tied and set and gets put away as in the top picture. So when your setting up first thing all you need to do is install the stein mounting strap, clip the rope grab end to it, and the other end clips into the bollard and then its all ready to be used as and when needed.
 
I'm going to try and get a video of it in use as I feel this will help a lot with the explanation!
 
Any thoughts or queries?