Showing posts with label Tree Climbing. Show all posts

Sunday, 19 October 2014

Tree Runner P500 - First Impressions

Had a couple of opportunities recently to try out the new Tree runner rigging bollard I picked up for CTC's lightweight rigging kit from the APF


Rigged down this smallish sycamore last week 


Nothing overly massive or complicated but still needed rigging


The ratchet holds the bollard well, and there was no sign of any movement, even when rigging some pretty hefty lumps (kind of size lumps that need cutting into 3 - 4 pieces in order to lift them onto the van)

We were using it with a 16mm rope, which is technically bigger than recommended (14mm) but seemed fine, just needed less wraps than you'd need with a thinner rope. 

As a secondary device for reductions/limb removals it would more than sufficient and a definite improvement on a portawrap or similar. The main advantage being the user friendly nature and how quickly in-experienced ground staff can pick it up and get to grips with it. 

Being rated at only 500kg it is no replacement for a Stein bollard, but would be a good device for small crews and start ups. or as a secondary device for larger firms. 


Thursday, 27 March 2014

Big chogs

This is just a quick video of me using a felling lever to walk/lever a big lump of poplar off the top of the stem


Quite a useful trick when dealing with short heavy lumps as you don't have any leverage with a pull line. The trick is to make a double thickness cut facing you before you cut through the rest of the lump, this way you can get the felling lever into the cut once the weight of the log has sat down. Then its just a case of prying the log forwards until it over balances and falls off the opposite side.

Monday, 24 March 2014

Pulling over a stem/mini MA system in action

Couple of pictures of my Mini MA system in action this week pulling over a large diameter stem from a big poplar fell


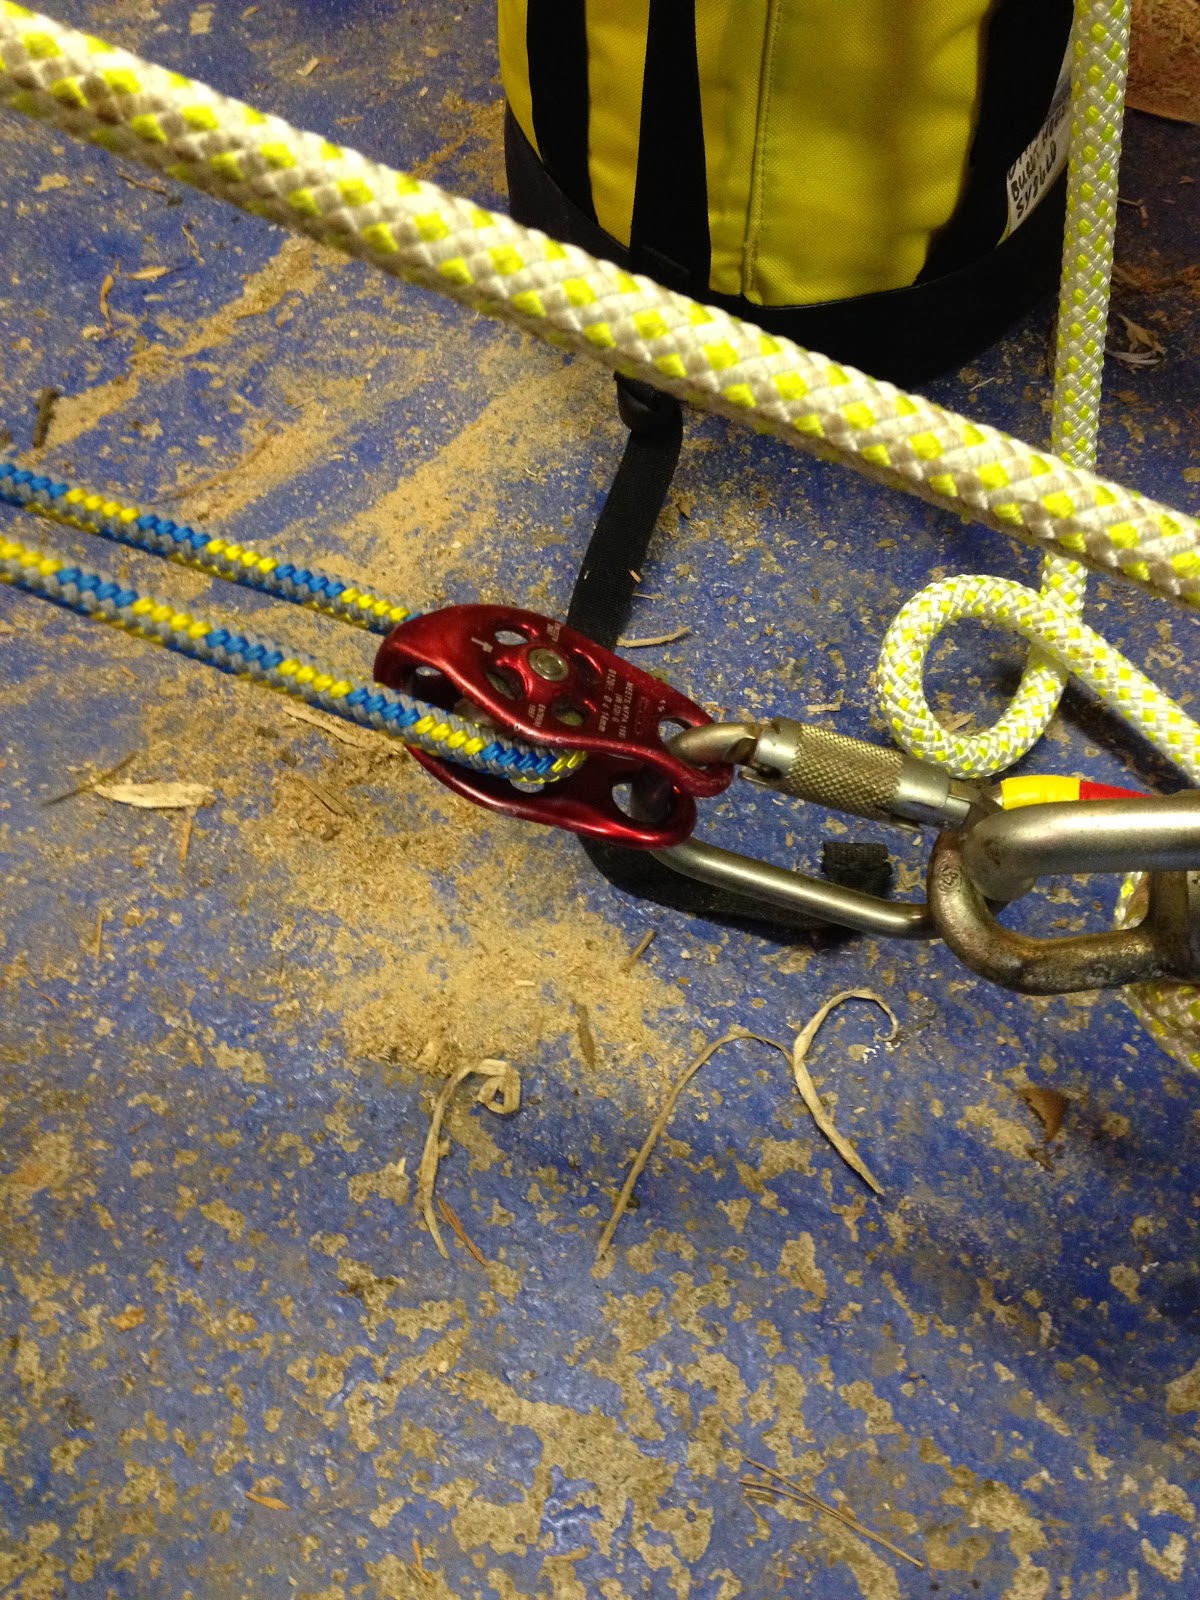
3:1 below on the ISC and the mini MA on top on the pinto

Not abundantly clear from the pictures but basically I set up a standard 3:1 MA on the rigging line using a large lowering block anchored to the cherry tree, this then went back to a Pinto rig attached to the rigging line via a 14mm sirius split tail blake hitched to the line. I then attached My mini MA to the pulling end of this line. This basically meant I had a 3:1 advantage pulling on a 3:1 system, now I'm not sure what this means mathematically speaking (maybe 7:1?) but all I do know is the two guys pulling the stem over had no trouble at all.


I'm sure this is nothing new to a lot of you and setting up mechanical advantage to pull a stem over is fairly standard practice. However I know in the past setting up anything more than a 3:1 just with a rigging line and pulleys uses up a lot of rope very quickly, even with a 60m rope you quite quickly run out of rope unless your anchor is very close to the tree your pulling over.

So by being able to use the Mini MA system on the end of the rigging line this issue was negated as well as considerably cuting down on the setup time. 

I have a video of the stem coming down I will upload at some point. 


Saturday, 22 March 2014

'Discing it down'

This is the term I use when you've rigged a stem down to a point where its either to big to effectively lower or low enough that you can get away without rigging but theres still no room to fell. So you do the only thing you can, cut it into discs that are small enough to push off to top of the stem.

When there is still the potential to cause damage or the ground needs protecting (patio or tidy lawn) we have found the following to be fairly effective


The double layer of logs helps to decrease the distance of fall and spread the force of impact, and the tyres are obviously there to take the brunt of the impact. You have to be accurate with discs and it works best when they land flat on the tyres. The tyres need replacing each time but it still works out much quicker than any other method I've tried. 

Once you've got lower still you can condense the tyres at the base of the tree and start to take some bigger lumps. Keeping the other blocks in place helps to contain the lumps as they come down and deflect them into the base of the tree. You'd be amazed at how well this works and how much energy the tyres will absorb. 


Certainly worked well on this Swamp cypress fell 


Friday, 21 March 2014

Rock Exotica RockO (Non locker)

Got this a few weeks ago after getting fed up with the small conventional style accessory carabinas that didn't seem big enough to hold both of the rings on my cambium saver and still function properly, making it tricky to retrieve from the back of my harness. 


Only a silly little thing but over time annoying enough for me to want to find a solution. 


This fits the bill nicely. Feels solid and well made, no sideways play in the gate and the little groves in the gate definitely aid grip. I'm a big fan of the oval carabina, they just seem to make much more sense to me, any one else agree? 


Wednesday, 19 March 2014

Another splice

Might be getting slightly addicted to this, here is another Sirius bull rope splice, this time in in 12mm. 


Kept the eye nice and tight on this one with the idea of it holding a carabina captive 


Not the neatest, but I'm still quite pleased with how it came out. The process is definitely getting easier, no youtube tutorial or anything this time!


This was spliced on the end of a 22m rope that I got from Honey Brothers (see post) for the princely sum of £13.50. I've been using it for a tag/pull line mostly, especially useful this week as we've been blocking down a big swamp cypress, it makes life much easier when you have a pull line on the top of the blocks. 

The idea with the crab on the end is to save tying a knot every time, and to make it easier to clip out of the way whilst rigging up the next section as I usually put the pull line in last to save it getting in the way.  


Also quite often with a tag line you need to pull the rope up in one go, attach it to the branch and then throw the rest of the rope out to where you want it, this way it makes it slightly easier for the groundies to send it up in one go. 

I'm also planning on using this line for minor rigging jobs, e.g. on crown reductions and prune aways when you just want to rig a couple of bits from the periphery of the crown. So I can either use slings and clip to the crab or just choke it round the branch (not best practice I know but a 30kn steel carabina can take a small amount of side loading lowering small branches)

Anyone else use a splice eye on rigging ropes?

Tuesday, 18 March 2014

Spliced spider leg

Spliced up this spider leg today


Those of you not familiar with a spider leg it's basically a dead eye sling with a much larger spliced eye, meaning it can be attached to the rigging line via a prussic and used to cradle branches.


But can still be used as a normal dead eye, this one is tied out of 14mm sirius bull rope and is about 5m long 


Locking stitch and whipping 


Hanked up for storage. 

This is definitely a cheaper way of getting rigging gear. Brought a 10m length for about £10 (Honey Brothers end of real deals) and have ended up with a 5m spider leg (retails about £50) and will make a 4m dead eye out of the other length (retails for around £40)

Thats assuming I'm doing them correctly and their not going to fail as soon as I use them, best test them out on something fairly straightforward with a clear drop zone I think!

Friday, 14 March 2014

Big shot trigger set up

There are things I can do well and there are things I cant, using a throwline is most definitely one thing I can't! I think a big part of it is lack of patience, I miss a few times or the line gets stuck and I give up grab the ladders and just climb the tree. This has lead to me never developing my throwline skills at all.
 
So when presented with a job a few years back where ladders were going to be woefully inadequate and the throwline the only realistic option I had a choice to make: practice for hours and hours till I could hit any branch, or buy a big shot...
 
 
So this is the big shot, on its own it definitely increased my accuracy and success rate with the throwline, but still wasn't perfect. The trouble was that there is quite a bit of variation in where you hold the catapult, especially when putting it under a lot of tension, this leads to a lot of variation in where the thing ends up!
 
I spotted a thread on Arbtalk where someone had developed a system involving an archery trigger and a tie down strap to turn the big shot into something you could almost calibrate.

 
Here I've fixed the archery trigger to the business end of the tie down strap and covered it in heat shrink to tidy it up (my gear OCD again!)

 
The trigger clips into a 3mm piece of accessory cord tied onto the big shot pull down handle

 
The hook end of the tie down strap just sits in the end of the pole, I use one 6ft pole for most stuff or x2 4ft poles for really high shots.
 
And you end up with this:
Sorry bit of a rubbish picture
 
The tie down strap gives you a 2:1 mechanical advantage with the grab bit capturing progress, so you can set it to the desired tension take aim and fire when ready!
 
Here's a link to a video of someone else's system in operation
 
 
Then the whole lot packs into this old chalk bag for storage
 
 
Not something for every day use but it most definitely has its place and has saved me a lot of wasted hours.


Thursday, 13 March 2014

Mini MA system: more pics

Just some better pics of the mini MA system I've been playing around

Set up in situ as the stein block goes on
Here you can see I've tied a small loop on the tail of the cord that attaches the pinto to the  rope grab
then its fairly straight forward to clip the rope grab to the rope and unclip from the mounting strap
Here I've hoisted up a pretty hefty lump of eucalyptus
Tying off the rigging line on the stein block in order to advance or remove the rope grab

Hope these pictures help to explain the system slightly better, will try and get a video up soon 

Tuesday, 11 March 2014

Mini mechanical advantage system

Can you guess what it is yet?


I've mentioned in previous posts how I've been playing around with a few ideas for tensioning the rigging line. I was looking for several things: something simple that could be taught in a few minutes that was also fairly idiot proof, something that was easily installed and not too gear intensive, I wanted at least a 3:1 mechanical advantage (MA) and I wanted to avoid having to use knots to attach it to the rigging line.

This has yet to be used in anger and only played about with in my workshop so you'll have to excuse the pictures.

So if you assume the rigging line has been set as normal and the end your looking at here is coming down from the tree to the protawrap/bollard.

 
The rope grab is attached to the line with the MA system already in place
 
 
The other end of the MA systems clips into the top of the porty/bollard
 

Then by pulling on the working end of the MA system tension is applied to the rigging line, with progress being captured on the porty/bollard
 

Once the MA system is out of room the rigging line can be tied off
 
 
A few wraps and a couple of half hitches usually does the trick

 
And if needed the MA system can be advanced up the line again to add more tension/pull the line further.
 

When not needed or once the line has been tensioned sufficiently the rope grab is removed from the rigging line and clips into a stein mounting strap installed well above the bollard, the other end of the MA system can be left in place for the duration and everything is ready for when MA is needed again.
 
 
So this is by no means the best explanation but I hope you get the general idea. everything is pre tied and set and gets put away as in the top picture. So when your setting up first thing all you need to do is install the stein mounting strap, clip the rope grab end to it, and the other end clips into the bollard and then its all ready to be used as and when needed.
 
I'm going to try and get a video of it in use as I feel this will help a lot with the explanation!
 
Any thoughts or queries?


Monday, 24 February 2014

Felco Secateurs Model 4 Standard - Review

As far as I'm concerned a good pair of secateurs is an essential item in any arborists tool box. I use mine at least a couple of times every week; on small reductions or thins, pruning young trees from the ground, formative pruning on newly planted trees even chopping stuff up smaller to bag up on 'through the house' jobs.

I've had these for about 10 months now and I'm pretty pleased with them, there a massive improvement on the pair of cheepo ones I had before.


The model 4 Felcos are a fairly no frills version but do everything you'd expect of them, they will cut up to 1" diameter branches (species depending) They cut clean with very little tearing of bark and splitting of the wood, this obviously increases with the larger branches/twigs. With smaller finger sized stuff cutting is pretty effortless and the curved blade and anvil prevent the piece from slipping, handy when your at full reach on the tips of a wet slippery Lime!


There is very little to go wrong with these secateurs, they've suffered a reasonable amount of abuse in the time I've been using them, been dropped plenty of times and have spent a lot of their life kicking around in the bottom of my climbing bag. They are showing very few signs of ware and the edge is just as keen as the day I brought them. At around the £30 mark they are a bit of an investment compared to a £5 blackspur pair, but assuming you don't loose them they should last 10 times as long. 

To be honest I don't use them quite as much as I should, often making do with my Silky for small diameter cuts that it really isn't suitable for. Having a pair of secateurs on you just gives you that increased level of accuracy and ability to leave some very tidy finishing cuts. 


I find the only down side to these is that they don't have any means of attaching a lanyard of any description which can be a bit of pain when in the tree. I've managed to solve this when I was given an old leather Felco holster that holds them nice and snug and has a fairly solid clip for attaching them to my harness with 

All in all pretty pleased with them and would recommend them to anyone looking to invest in a quality pair of secateurs. I would also recommend anyone starting out in Arb, looking to improve on their reductions to try taking a pair up and seeing if you find it any easier/notice a difference in quality. 


Monday, 17 February 2014

Lanyard setup/Work positioning strop

I've played around with various different lanyard setups over the years, I First started climbing with a big thick 19mm wire core thing with a massive triple action fixed krab on the end, it was about 4m long and adjusted with a prussic, pretty basic and very heavy. I then moved onto a thinner diameter wire core strop, about the same length only with an ISC rope grab and wire eyelets each end. I climbed with this for about 5 years and never really had and reason to complain, I still have it and will use it occasionally for chogging down big stems. 

I then moved on to trying out various rope strops, all of my own making, I went though a couple of different lengths and thickness of ropes/hitches before I came up with what I am currently using.


The rope is actually a 3m replacement rope for the Petzl Grillon, which I chose because I wanted an 11mm rope with a spliced/stitched eye either end and this was actually the most cost effective way (about £30ish) and came with the added bonus of the protective sheath. This is particularly good for keeping rope and hitch clean when working on conifers or dirty trees.  

I chose 3m as with my style of climbing I rarely need anything longer as I'm usually able to get most places in a tree with just my main anchor point and use the lanyard only to attain my final working position. This means I don't have to drag a long lanyard around the tree getting it tangled and caught up on everything, or have to daisy chain it or stuff it into a stuff sack. 


I use a hitch climber as the tending pulley because of the added versatility the additional attachment holes provide, allowing me to use it as a secondary DRT (double rope technique) anchor when needed. Or if I need a little extra length as a SRT (single rope technique) strop (assent/positioning only)


The stitched eyes have a protective plastic covering that holds the DMM ultra O karabina firmly in place making clipping in one handed very easy. (These are my crab of choice at the moment, full review to come)


Having a spliced eye either end negates the use of a stopper knot 


And enables me to clip both ends up out of the way, keeping everything nice and neat as well as not having to drag it along the floor when I walking around on the deck


The hitch cord is 8mm Sirius and works really nicely on a Distle with this rope, it rarely jams and grips every time. 

All in all I love my current set up and would replicate it in a heart beat should any element need replacing at any point. I much prefer the versatility and flexibility of a rope strop over the rigidity and additional safety of a wire core.

 I'm always interested in other climbers setups if anyone wants to share theirs?


Wednesday, 12 February 2014

ISC RP205 Rigging rope grab

Lately I've been playing around with a few ideas for a slightly easier method of pre tensioning the rigging line when using a fixed bollard or similar.

One of the key things I needed was an easily attachable mechanical rope grab that was compatible with 16mm lines.

After hunting around for a while I stumbled across this ISC rope grab.


Not necessarily what I initially had in mind but it is compatible with 14-16mm lines (and will actually fit our 19mm bull rope in as well, although not recommended)


This model comes with a push pin. Basically by pushing the small silver pin in the middle of the red ring you can see, the pin then slides out releasing the cam 


Not something that can be done one handed but is quick enough and hopefully will work pretty well for what i have in mind for it. 

I quite like the simplicity of this device, no springs or small parts to go wrong and the only 2 moving pieces are attached via small wires. It has a very solid feel to it and I have no doubt it would take a lot of abuse before showing any signs of ware. Now I just need a few more bits and I'll hopefully have something a bit more interesting to share...